 English (UK)
  Nederlands
Create a bootable USB Flash Drive with Rufus and sometimes with USB Image Tool (USBit).
Rufus can be downloaded here: Rufus.
You use Rufus if you want to copy an ISO file to the USB flash drive so that you can boot from it and perform an installation or upgrade.
The main screen of Rufus is shown below.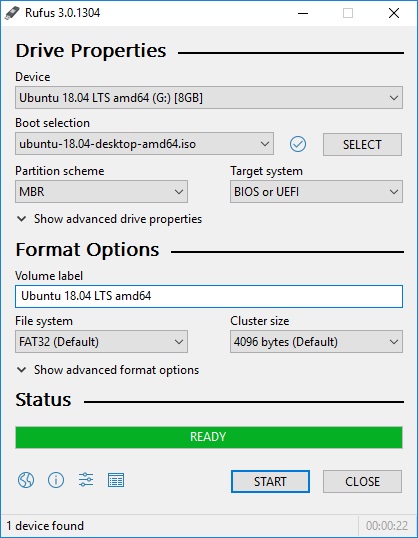
More information on how to use Rufus can be found at this one Rufus FAQ.
USBit can be downloaded here: USB Image Tool. Download the ZIP file and extract it into an empty directory, default directory is "usbit".
You can use the USB Image Tool if you want to make a backup of your USB Flash Drive or if you want to copy an SD Card to or from a USB Flash Drive. You do need an SD Card reader on your computer. You can for example use it to copy a VMWARE ESXi USB Flash drive to an image file, so you can restore it if an ESXi update fails.
This is the most important screen.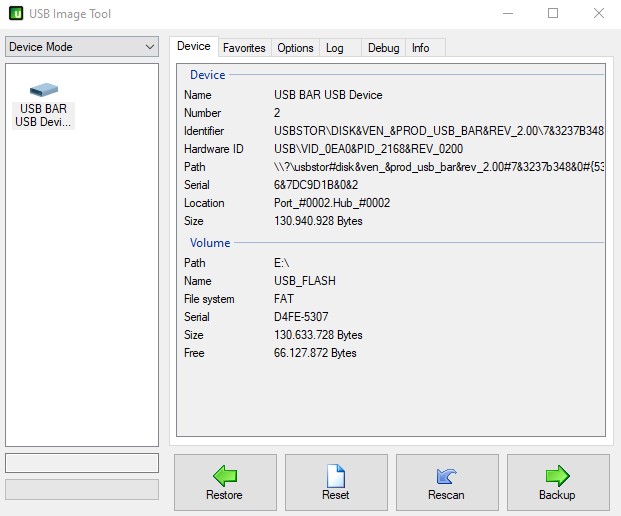
Select the correct USB device on the left. Then you have two buttons at the bottom, Backup and Restore, Rescan shows new devices if they were not already connected when the USB Image Tool was started. A Backup creates an image file on your computer. A Restore will restore this image file.
The second option of the Options screen (Truncate Oversize images) can be important if the storage space is a little too small for a Restore action. You have to make sure that the last part of your original file is empty. So this option is only important for a Restore action. With the button "Save settings to register" saves changes so that they remain valid after a restart.
Below you see the USB Image Tool Options screen.
More information can be found in the USB Image Tool FAQ.